⬜How to Link Add-ons to Items in Aurmenu – Step-by-Step Guide
Aurmenu allows you to add optional add-ons to items, whether paid or free, helping customers customize their orders according to their preferences. This guide will walk you through the correct steps to add add-ons to items in your menu.
1️⃣ Log in to Your Aurmenu Account
-
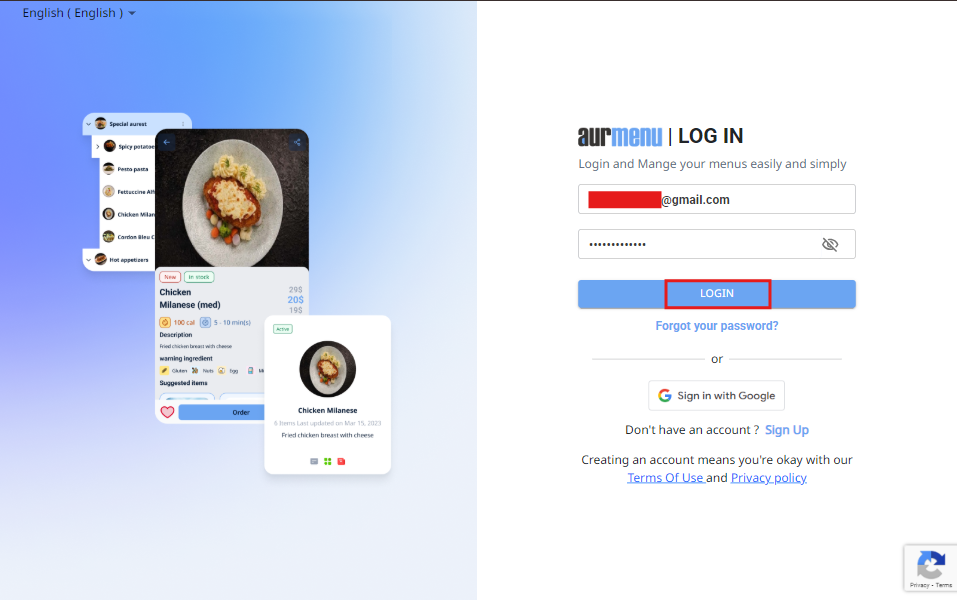
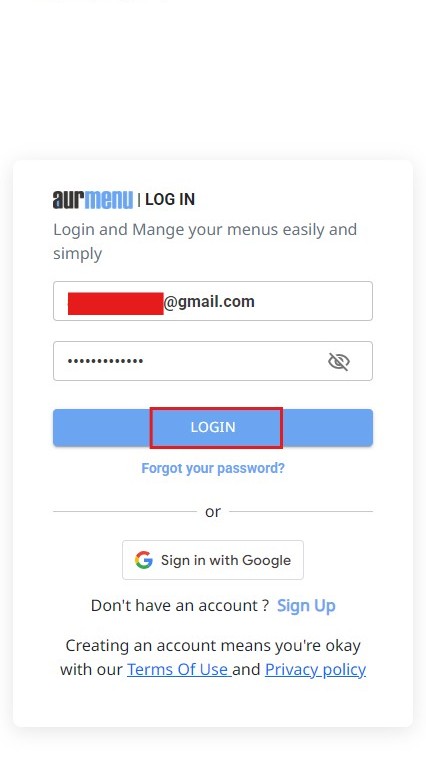
Log in to your Aurmenu account using your credentials.
-
If you need help with the login process, you can refer to the previous article.
2️⃣ Create Add-ons in "Order Options"
-
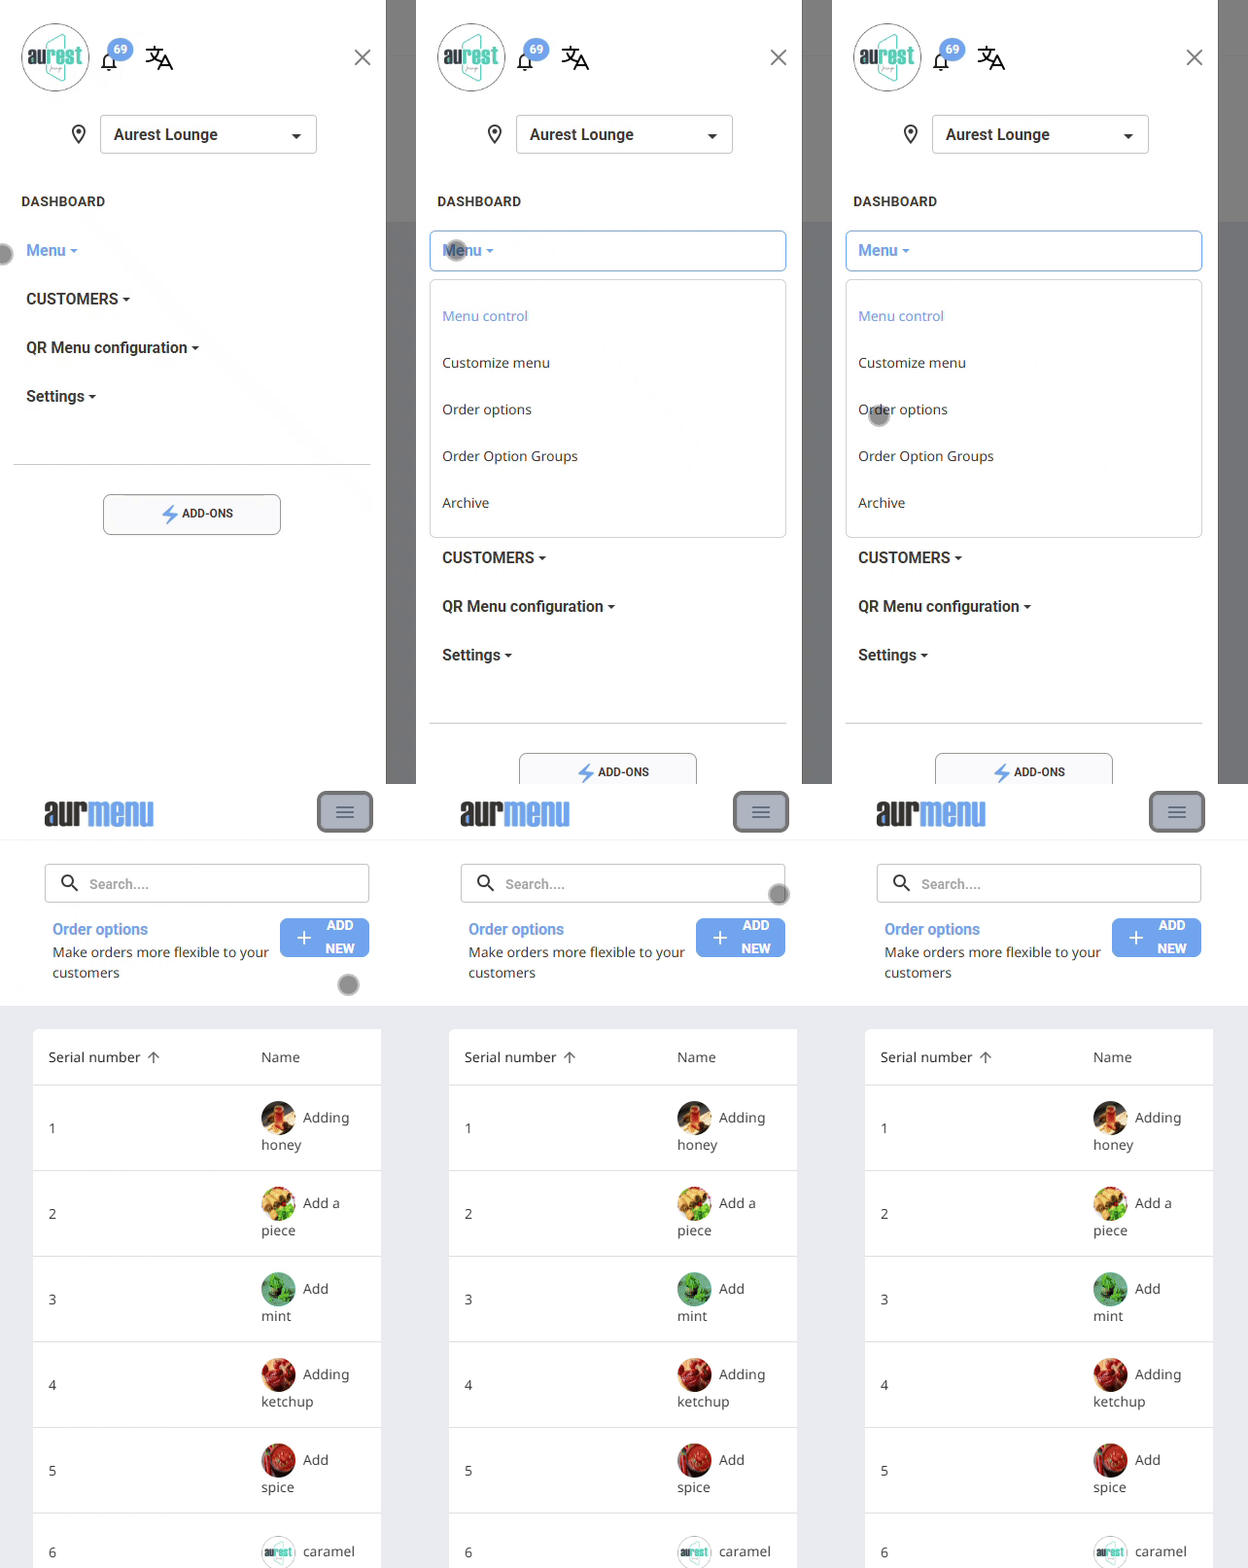
Go to "Menu Control" and select "Order Options".
-
Click "Add New" to create a new order option.

-
Enter the names of the required add-ons, such as Caramel, Marshmallow, Ice, Honey, A piece .
- Click "Save" to store the add-ons in the system.
✔️ For more details on how to create a new order option, you can refer to the previous article.
3️⃣ Create a Dedicated Section for (Paid Add-ons only)
If some add-ons are paid and require a price to be assigned, follow these steps:
-
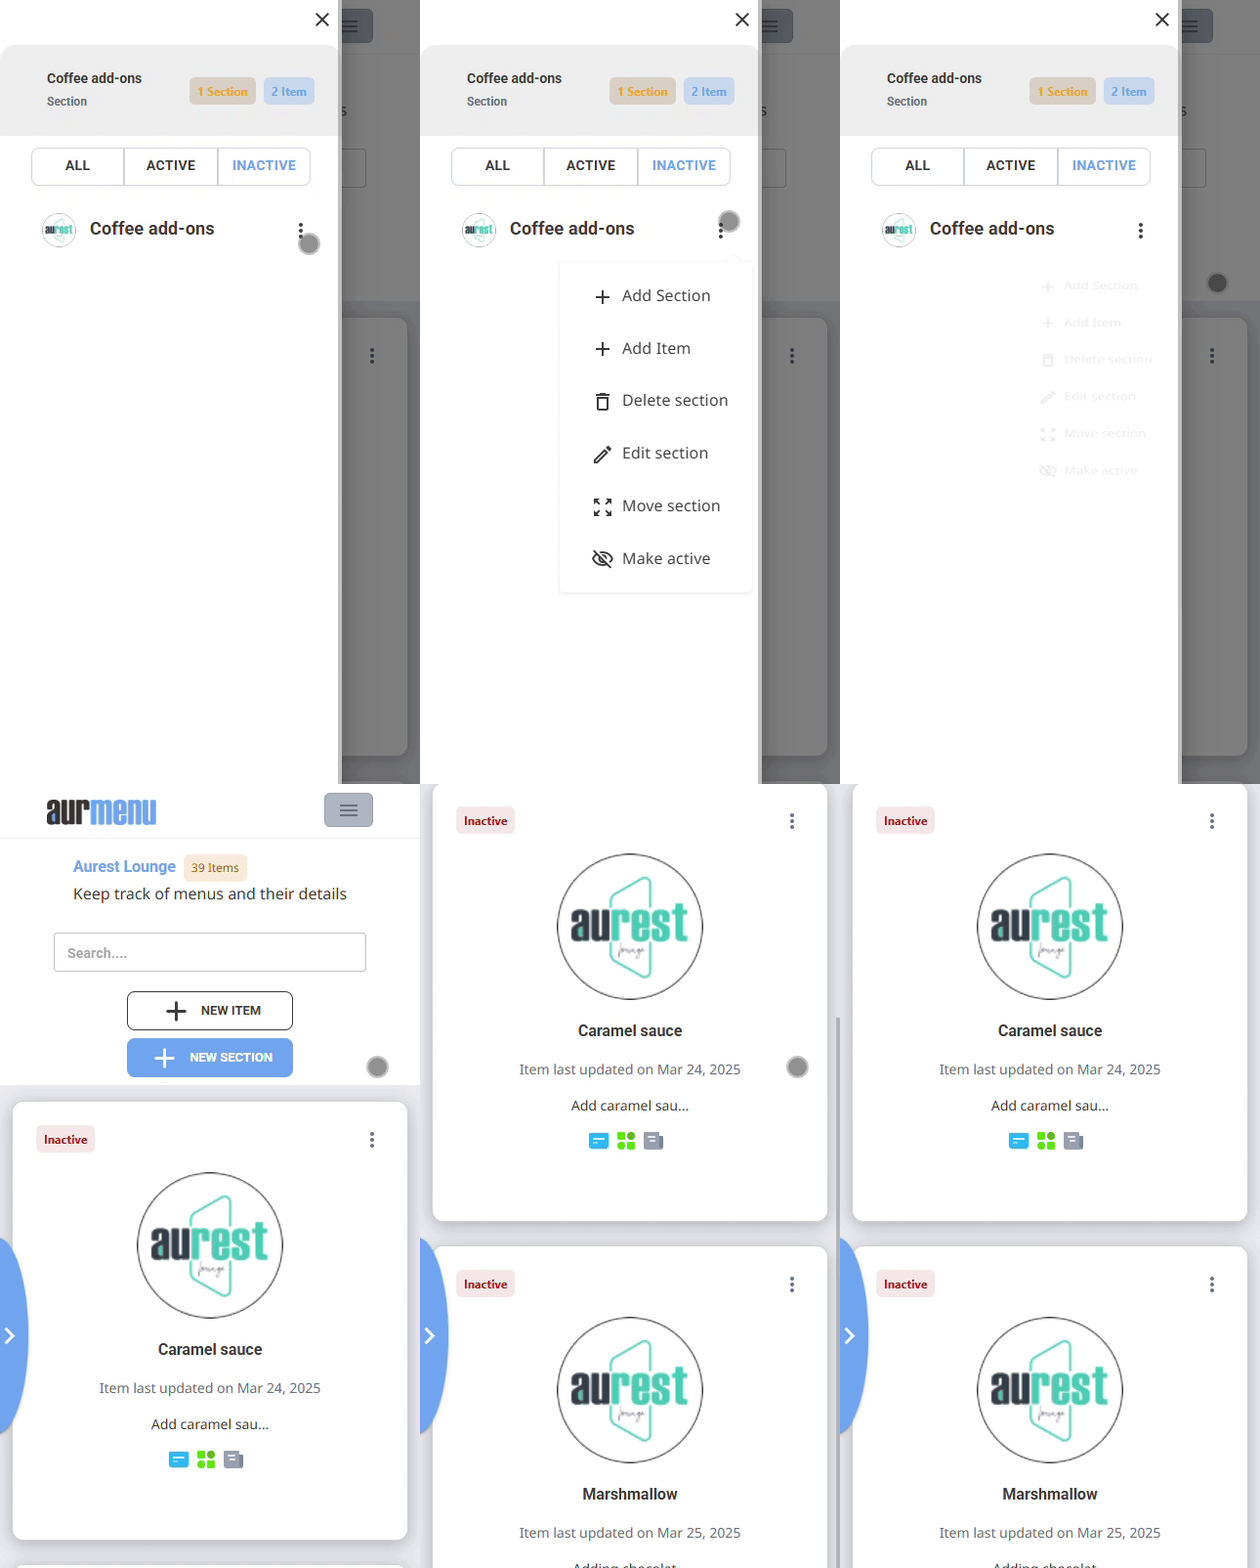
Go to "Menu Control" and select the menu containing the item to which the add-ons will be added (e.g., Coffee).
- Click "Add New Section" and enter a section name (e.g., Coffee Add-ons).
✔️ For more details on how to create a new section, you can refer to the previous article.
-
Set the section as inactive so it does not appear in the menu.

-
Add only the paid items within the section, specifying the price for each add-on:
-
Caramel – 10 SAR
-
Marshmallow – 15 SAR
-
- Click "Save" to save the section and its paid add-ons.
✔️ For more details on how to add a new item, you can refer to the previous article.
4️⃣ Link Paid Add-ons to Items in "Order Options"(For paid add-ons only).
-
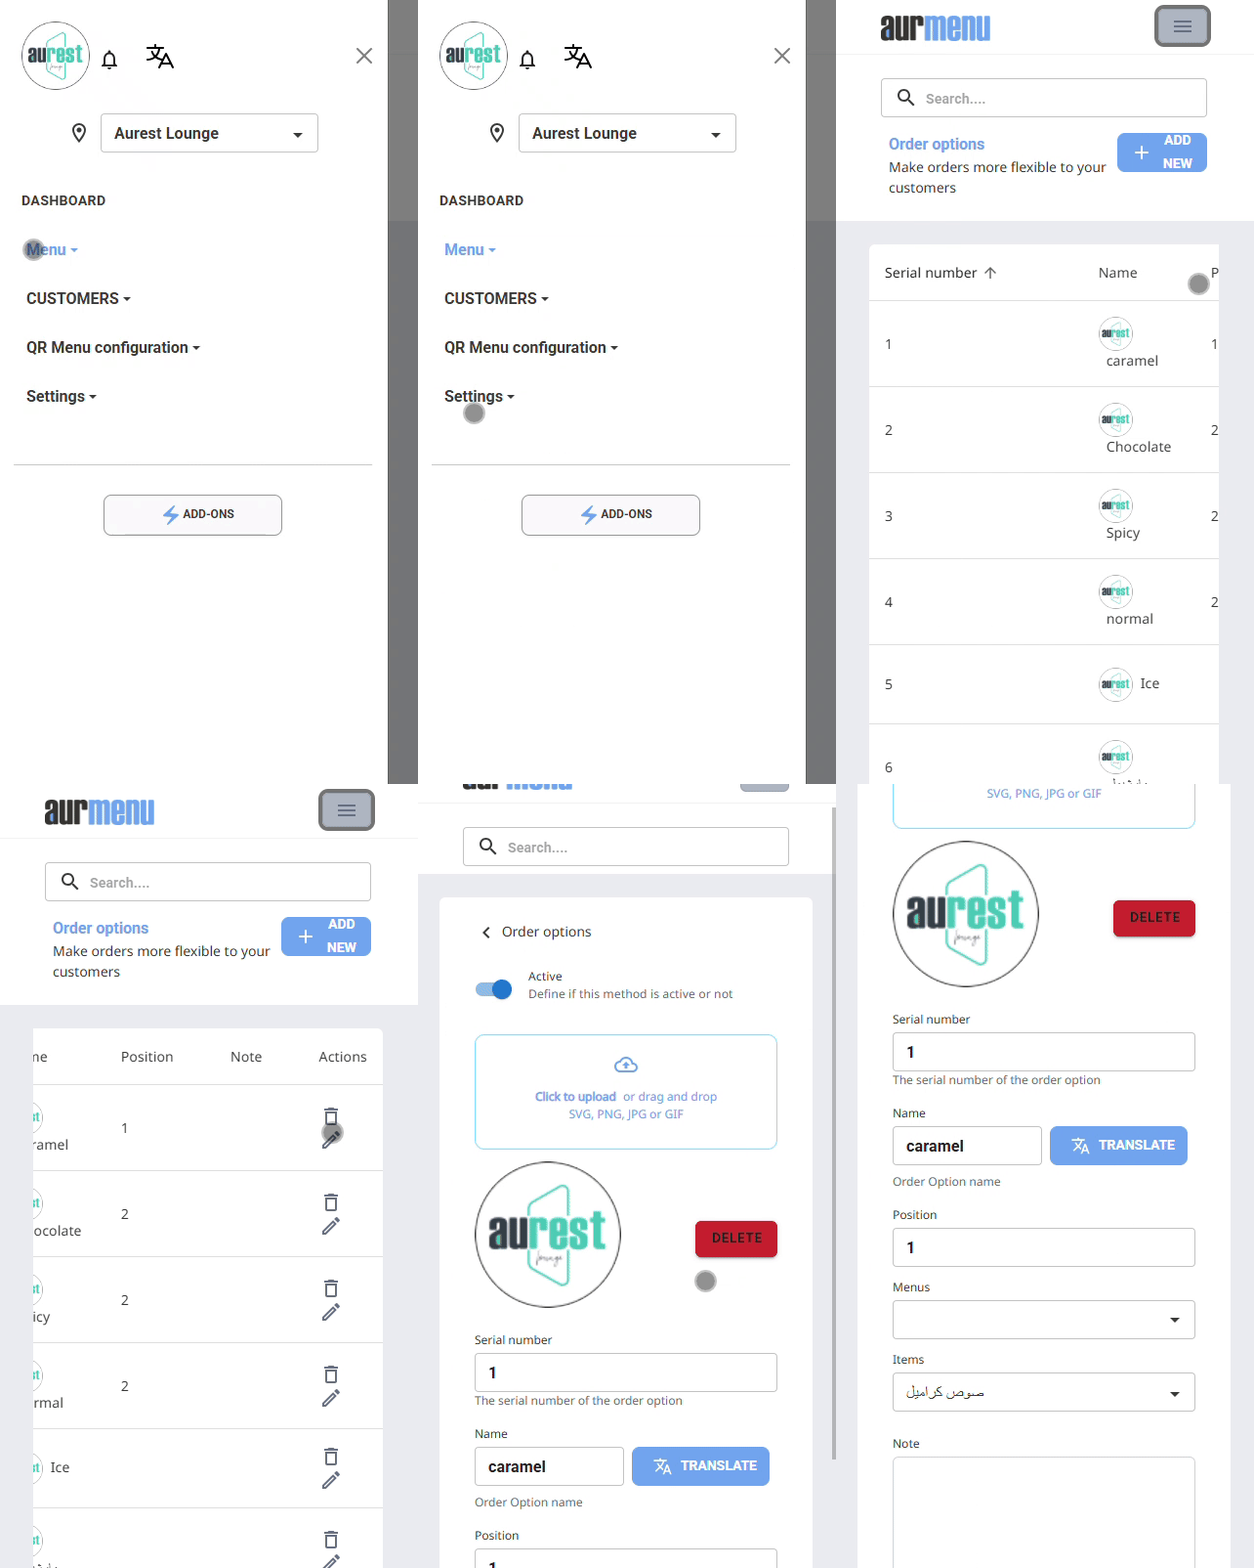
Go back to "Order Options".
-
Select the add-on (e.g., Caramel ) and click Edit.

-
In the Menu field, select the menu that contains the add-on.
-
In the Items field, link the add-on to the item with the same name in the inactive section (e.g., Caramel).
-
Repeat the process for all paid add-ons, then click "Save".
➤ Note: Free add-ons (such as Ice) do not need to be linked to any item or menu, as they can be added directly to the Order Option Groups later.
5️⃣ Create an Order Option Group
-
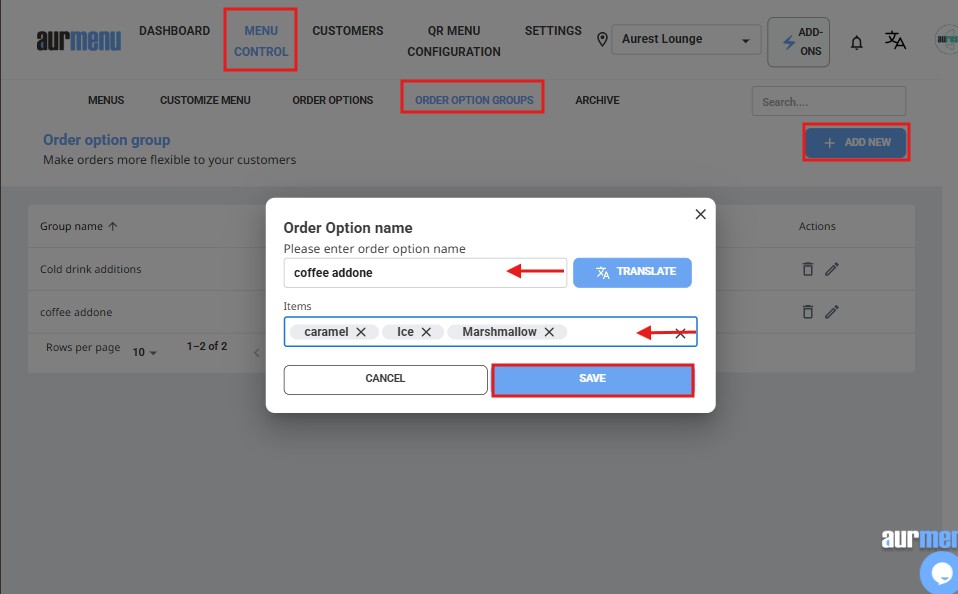
Go to "Order Option Groups" in Menu Control.
-
Click "Add New Group" and enter a group name (e.g., Coffee Add-ons).
-
Add all the required add-ons to the group (Caramel – Marshmallow – Ice).
-
Click "Save" to store the group in the system.

6️⃣ Link Add-ons to the Item in the Menu
-
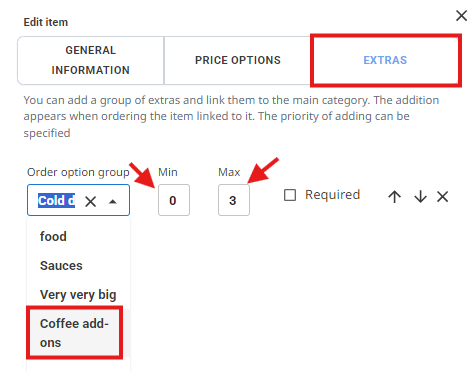
Go to "Menu Control" and select the desired item (e.g., Coffee).
-
Click "Edit Item".


-
Navigate to the Add-ons section in the item settings.
-
Choose "Coffee Add-ons" from the Order Option Groups that were previously created.
-
Set the minimum and maximum number of add-ons the customer can select.
-
Click "Save" to apply the changes.
7️⃣ Displaying Add-ons in the Menu and Invoice
After completing the steps above, the add-ons will be displayed as follows:
✔ In the menu – Customers can select add-ons while ordering, whether free or paid.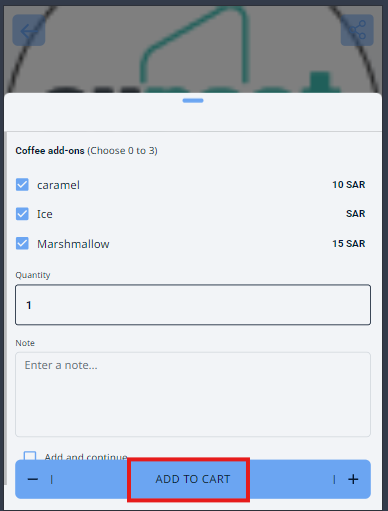
✔ In the invoice – Only paid add-ons will appear with their prices, while free add-ons will not be listed separately.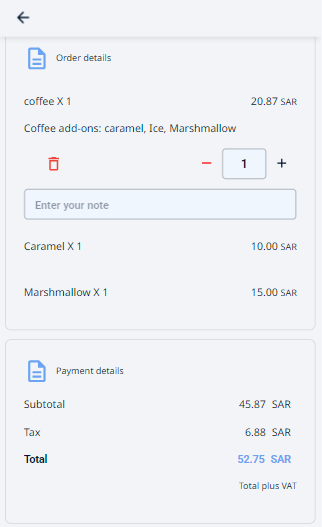
✨ Result
After following these steps, you will have successfully added add-ons to items in your menu, with full control over free and paid add-ons, ensuring they are correctly linked to the relevant items.
 العربية