 العربية
⬜How to Adding a New Item to Your Aurmenu List – Step by Step
Adding a new item to the menu in Aurmenu allows for organizing content, setting prices, and configuring add-ons and combo options according to the required settings. This guide explains the steps for entering items and customizing their details accurately.
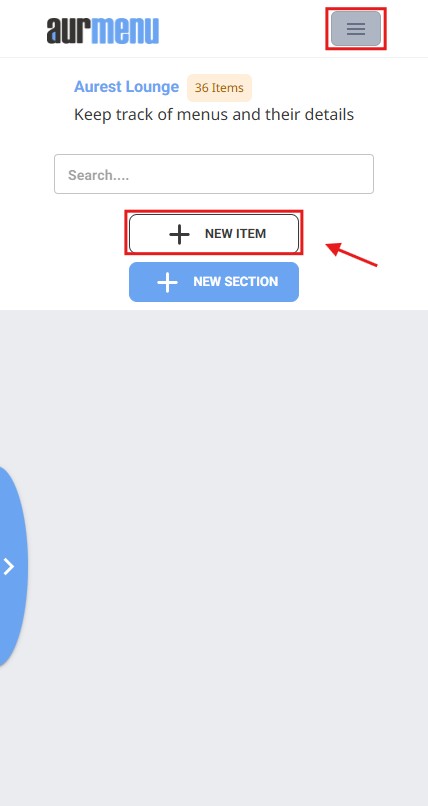
✅ Step 1: Accessing the "Add Item" Option
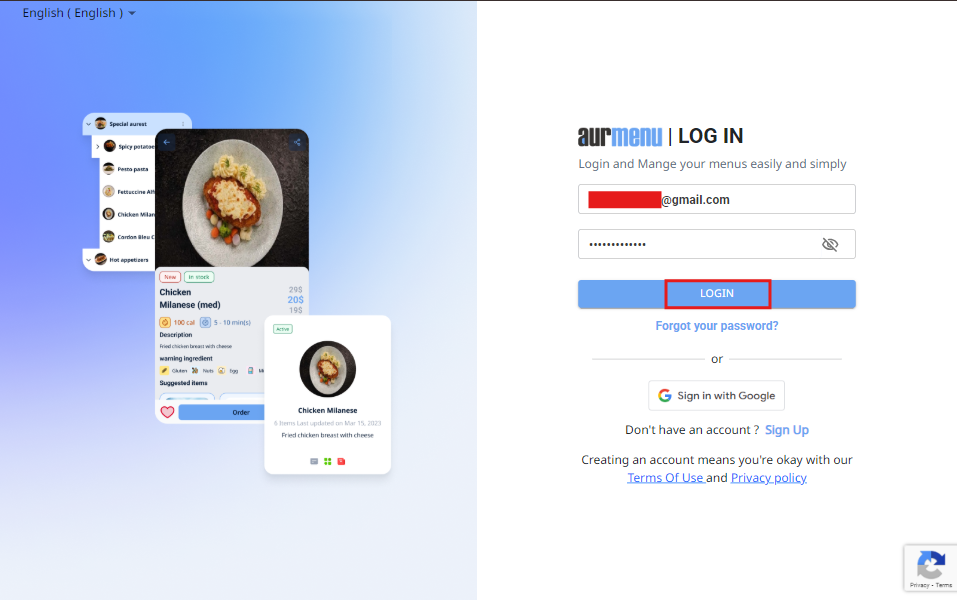
1️⃣ Log in to your Aurmenu account
- If you need help with logging in, you can refer to the previous article.
2️⃣ Go to Menu Control and edit the created menu
If you need help creating a menu from scratch, you can refer to the previous article.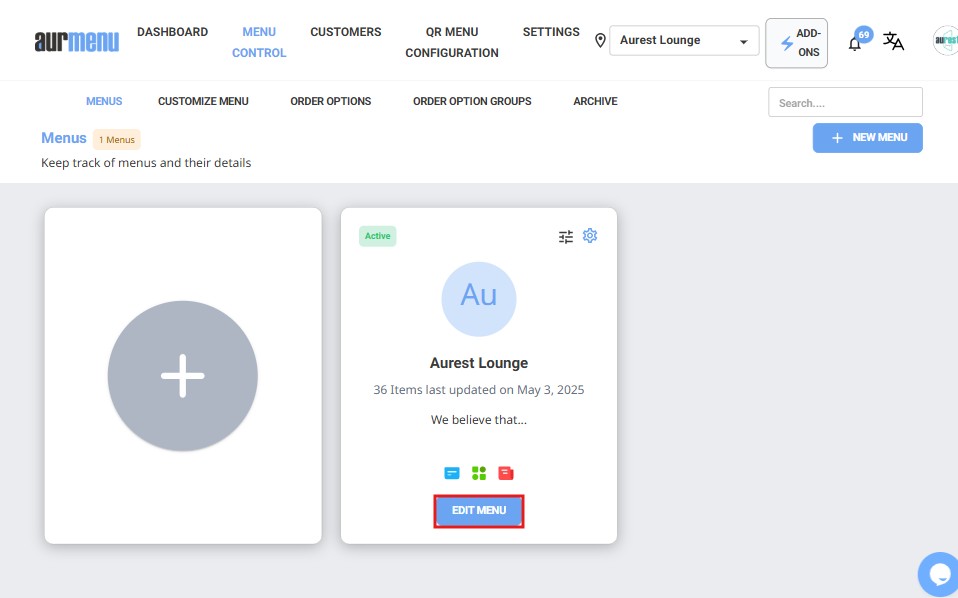

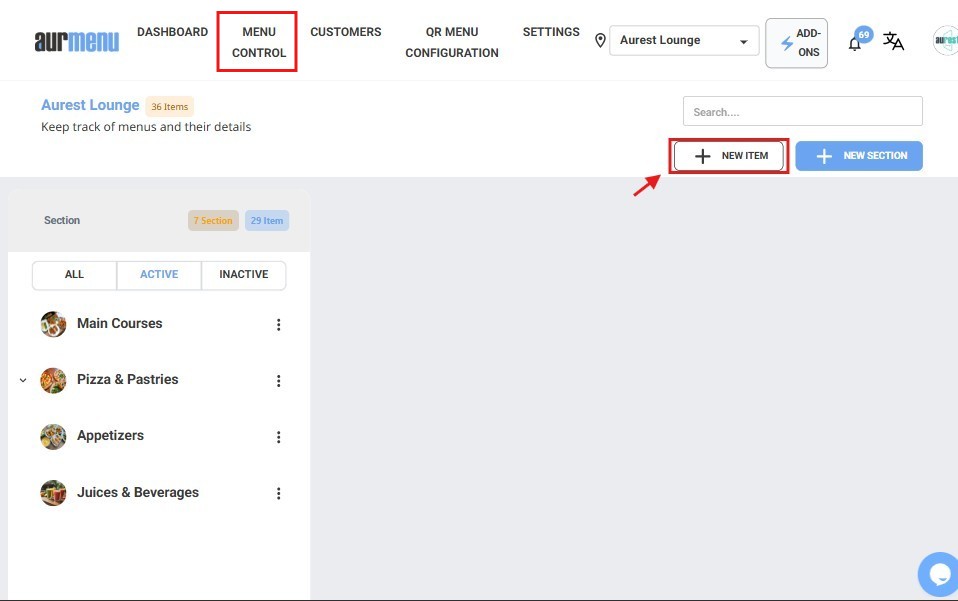
3️⃣ Click "Add New Item" to start entering item details.
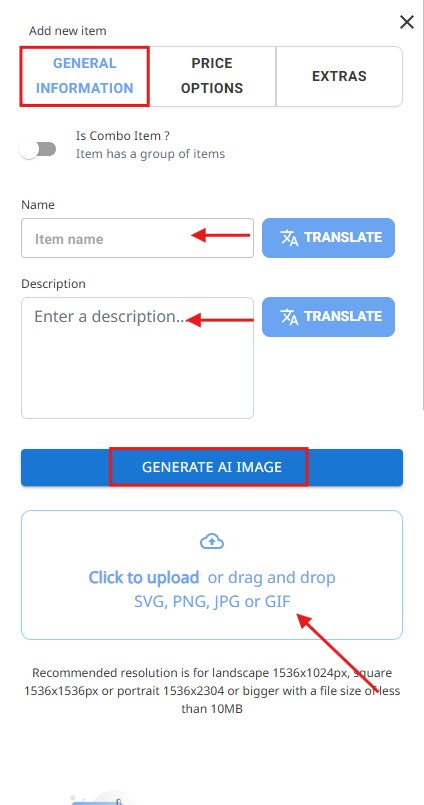
✅ Step 2: Entering Basic Item Information
When adding a new item, you will need to fill in some essential details, including:
1- Item Name & Description
-
Enter the item’s name (e.g., "Cappuccino").
-
You can translate the name and description automatically or manually into the customer’s selected language.
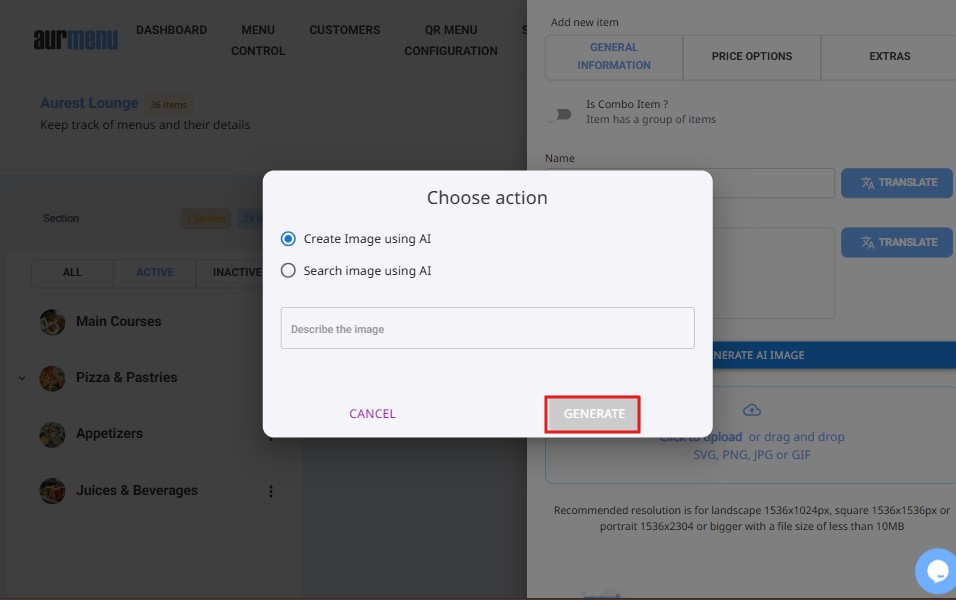
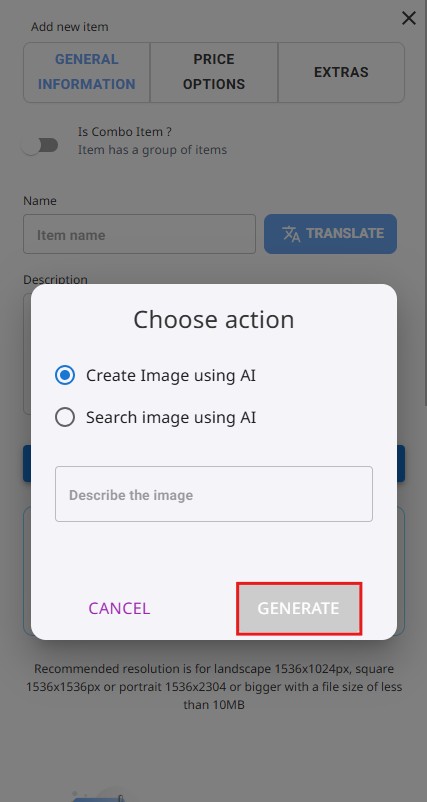
2- Uploading an Image Using AI
You can either manually upload an image or generate one using AI, which selects a suitable image based on the item description.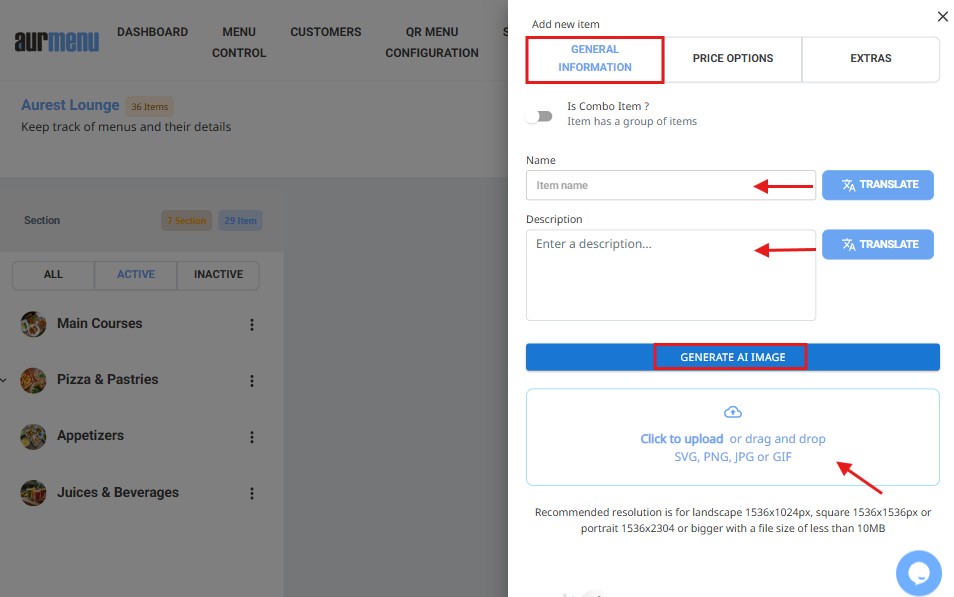
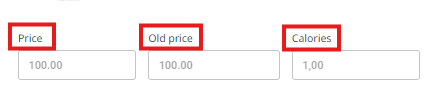
3- Pricing (Original & Discounted Price) and Calories
-
Enter the base price of the item.
-
For discounts, set both the original and discounted prices so the original price appears strikethrough.
-
Add the calorie count for the item to help customers make informed dietary choices.
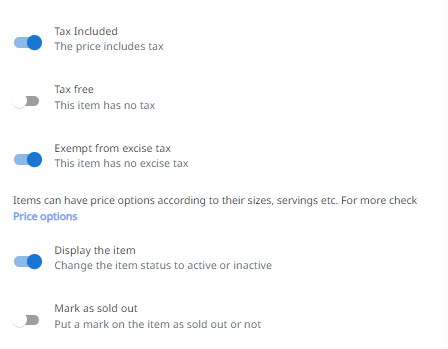
4- Additional Settings
-
Tax Inclusion: Choose whether the price includes tax or is tax-exempt.
-
Temporarily Disable Item: You can disable the item when needed.
-
"Sold Out" Tag: Use this tag to indicate that the item is currently unavailable.
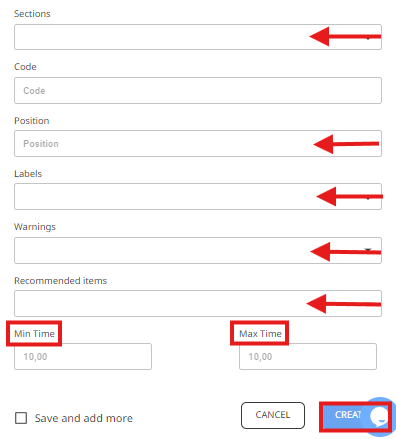
5- Assigning Category & Display Order
-
Select the category where the item will be listed (e.g., "Hot Drinks" or "Desserts").
-
Set the display order of the item within the menu to ensure it appears in the correct sequence.
6- Special Tags for the Item
Add helpful tags to guide customers in choosing suitable items, such as:
✅ Diabetic-Friendly
✅ Chef’s Special
✅ Vegetarian Option
7- Allergy Warnings
-
Specify ingredients that may cause allergies, such as nuts, gluten, or dairy, to protect customers.
8- Recommended Items
-
You can suggest related items that will appear when the customer views this item.
-
Example: If the item is "Cappuccino," you may recommend "Chocolate Croissant" as a pairing.
9- Preparation Time
-
Set the minimum and maximum time needed for the item to be ready.
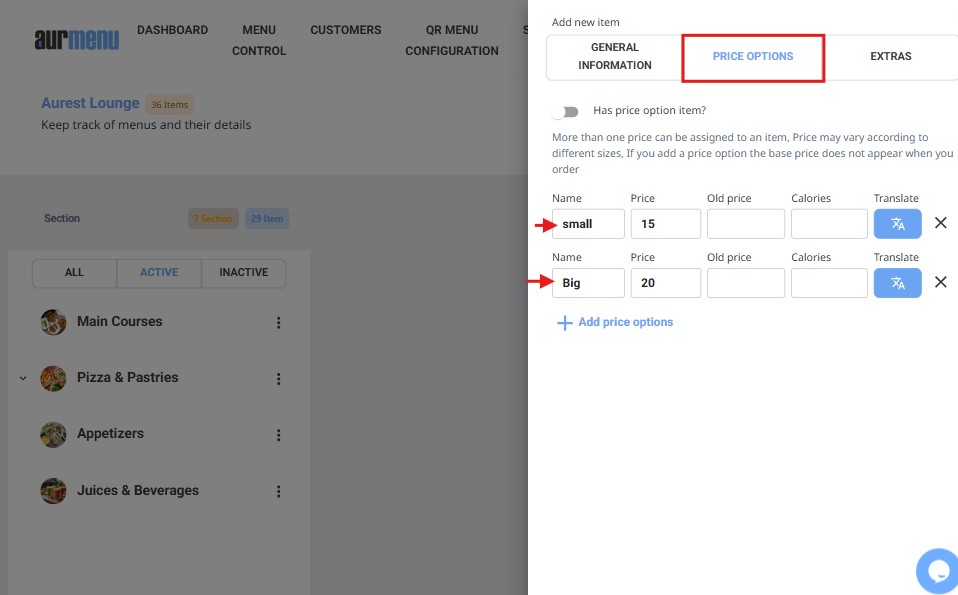
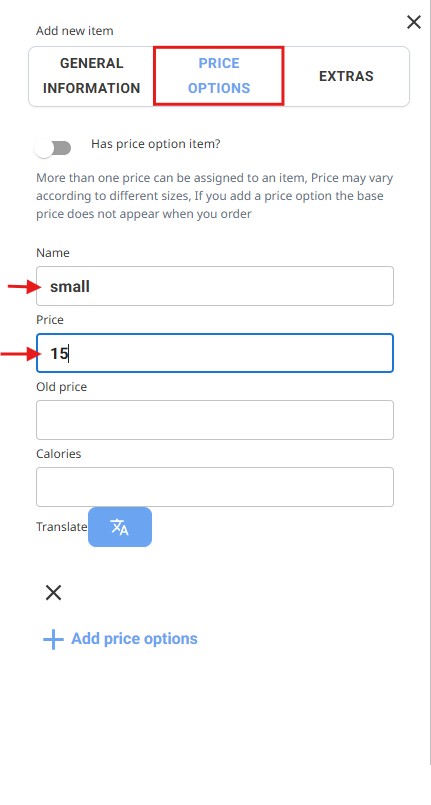
✅ Step 3: Customizing Prices with Multiple Options
If your item is available in different sizes or variations, you can set up custom pricing as follows:
✔ Adding Price Options:
-
Create different sizes or portions for the item with separate prices.
-
Example:
-
Small Cappuccino – 15 SAR
-
Large Cappuccino – 20 SAR
-
-
When price options are added, the base price will not appear, instead, customers will see the available choices.
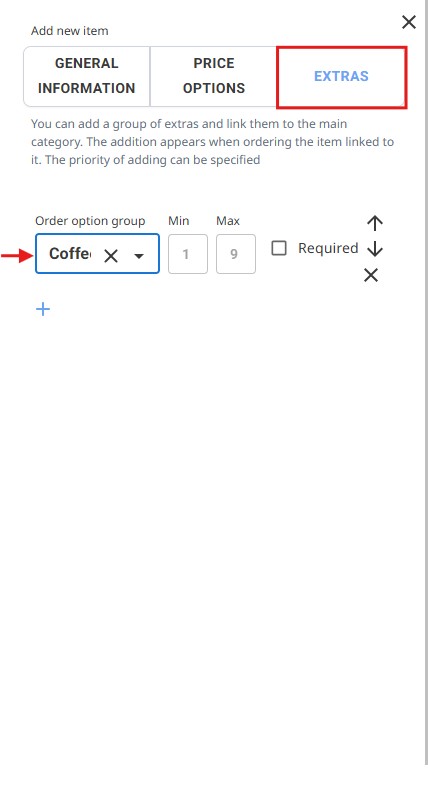
✅ Step 4: Adding Extras to the Item
You can allow customers to customize their orders by adding extra ingredients or modifications.
✔ Adding Extra Ingredients
-
Example: For coffee, you can offer extra flavors like vanilla, caramel, or hazelnut.
-
Set a minimum and maximum number of add-ons customers can select.
✔ Setting Additional Charges for Add-ons
-
Assign a specific price for each add-on.
-
Customize the available options for customers.
For detailed configuration, refer to the article "How to Link Add-ons to Items."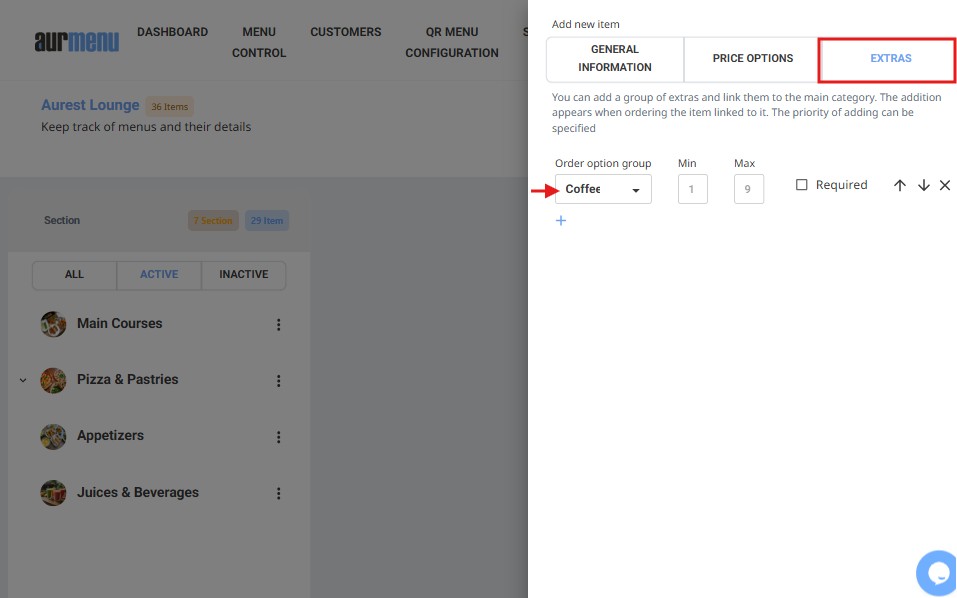
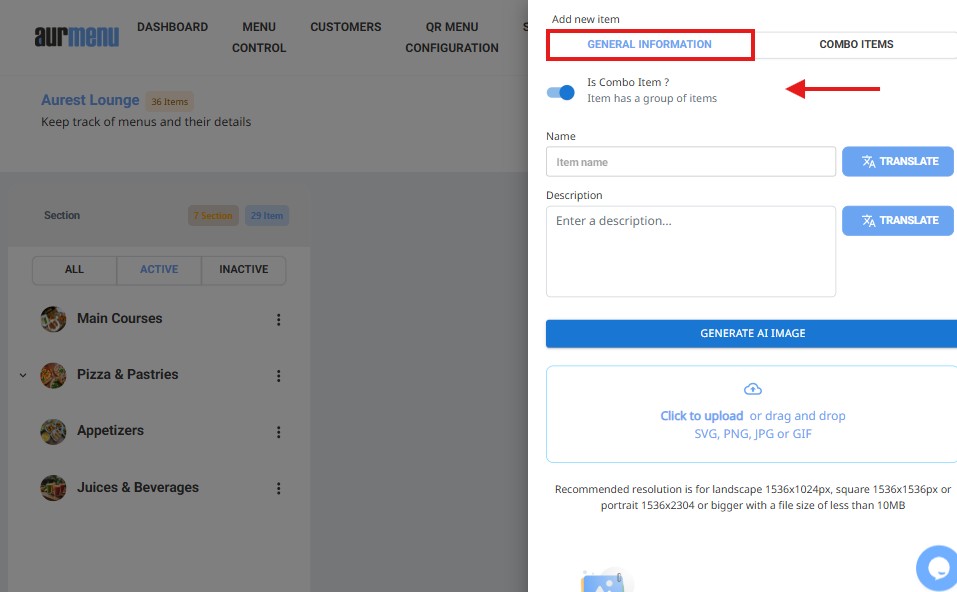
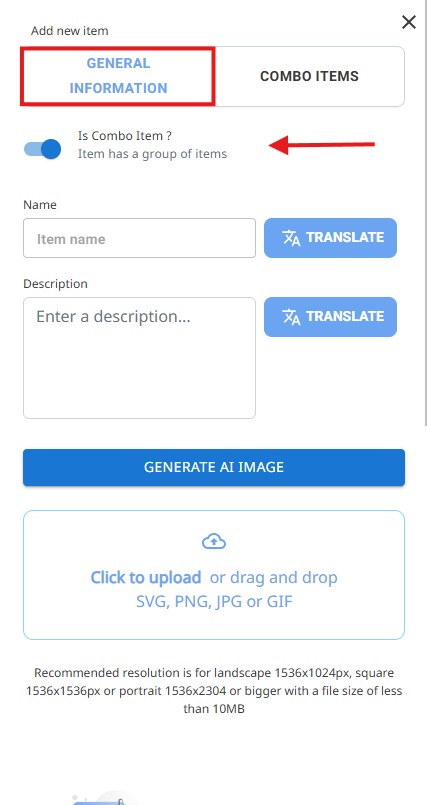
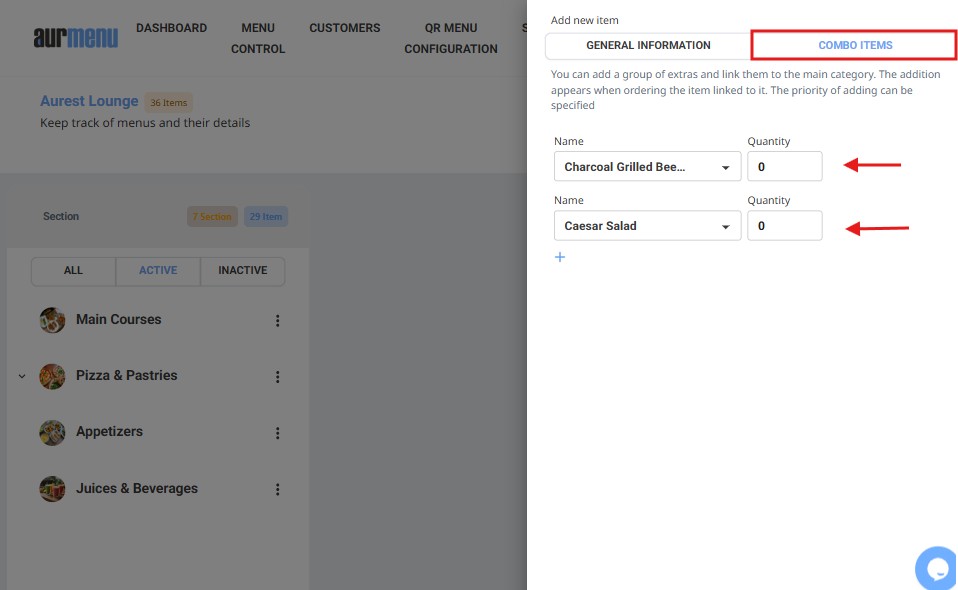
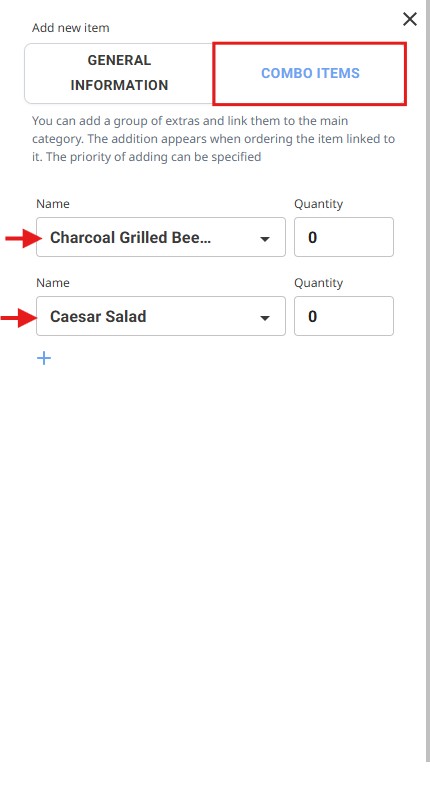
✅ Step 5: Creating a Combo Item (Multiple Items in One)
If you offer set meals, you can use the Combo Meal Feature, allowing you to group multiple items into a single option at a fixed price.
✔ Example of a Combo Meal
"Burger Meal" – includes a burger+ fries +soft drink for one price.
✔ Set Quantities & Ingredients for Each Combo Component
-
Define the items in the combo and their portions for a seamless customer experience.
✅ Step 6: Saving & Managing the Item
✔ After entering all details, click "Create" to save the item in your menu.
✔ If you want to add more items consecutively, select "Save & Add More."
✔ You can edit the item later from the menu settings if needed.
✨ Congratulations! Your Menu Is Now More Professional ✨