⬜ Comparison Between Pricing Options in Aurmenu System
The Aurmenu system offers flexible and diverse tools for defining item prices based on business needs, giving users the ability to customize the ordering experience with precision and efficiency. These pricing options include:
1️⃣ Adding an Item as a Price Option
➤ What is it?
This method is used when each option has its own independent price. Each option is created as a separate item in the system, then linked as a choice under a main item.
➤ Example:
A "Pasta" item can include:
-
Red Sauce Pasta – 50 SAR
-
White Sauce Pasta – 55 SAR
-
Chicken Pasta – 60 SAR
Each type is created as a separate item and then linked under a main item called "Pasta".
➤ When to Use:
✳ When each option has clearly different ingredients.
✳ When separate tracking for stock and reports is needed.
➤ Steps to Configure in the System:
-
From the side menu, go to the designated section.
-
Create each option as a separate item (e.g., Chicken Pasta, White Sauce Pasta, etc.).
-
Create a main item titled "Pasta".
-
In the main item settings, go to the Price Options tab.
-
Enable “Contains Price Option Items”.
-
Select each option from the list of created items.
-
Repeat for the remaining choices.
-
Click Save.


2️⃣ Price Options (e.g., Size, Flavor, Type)
➤ What is it?
Used to offer multiple internal choices within the same item, such as size or flavor, without creating a separate item for each.
➤ Example:
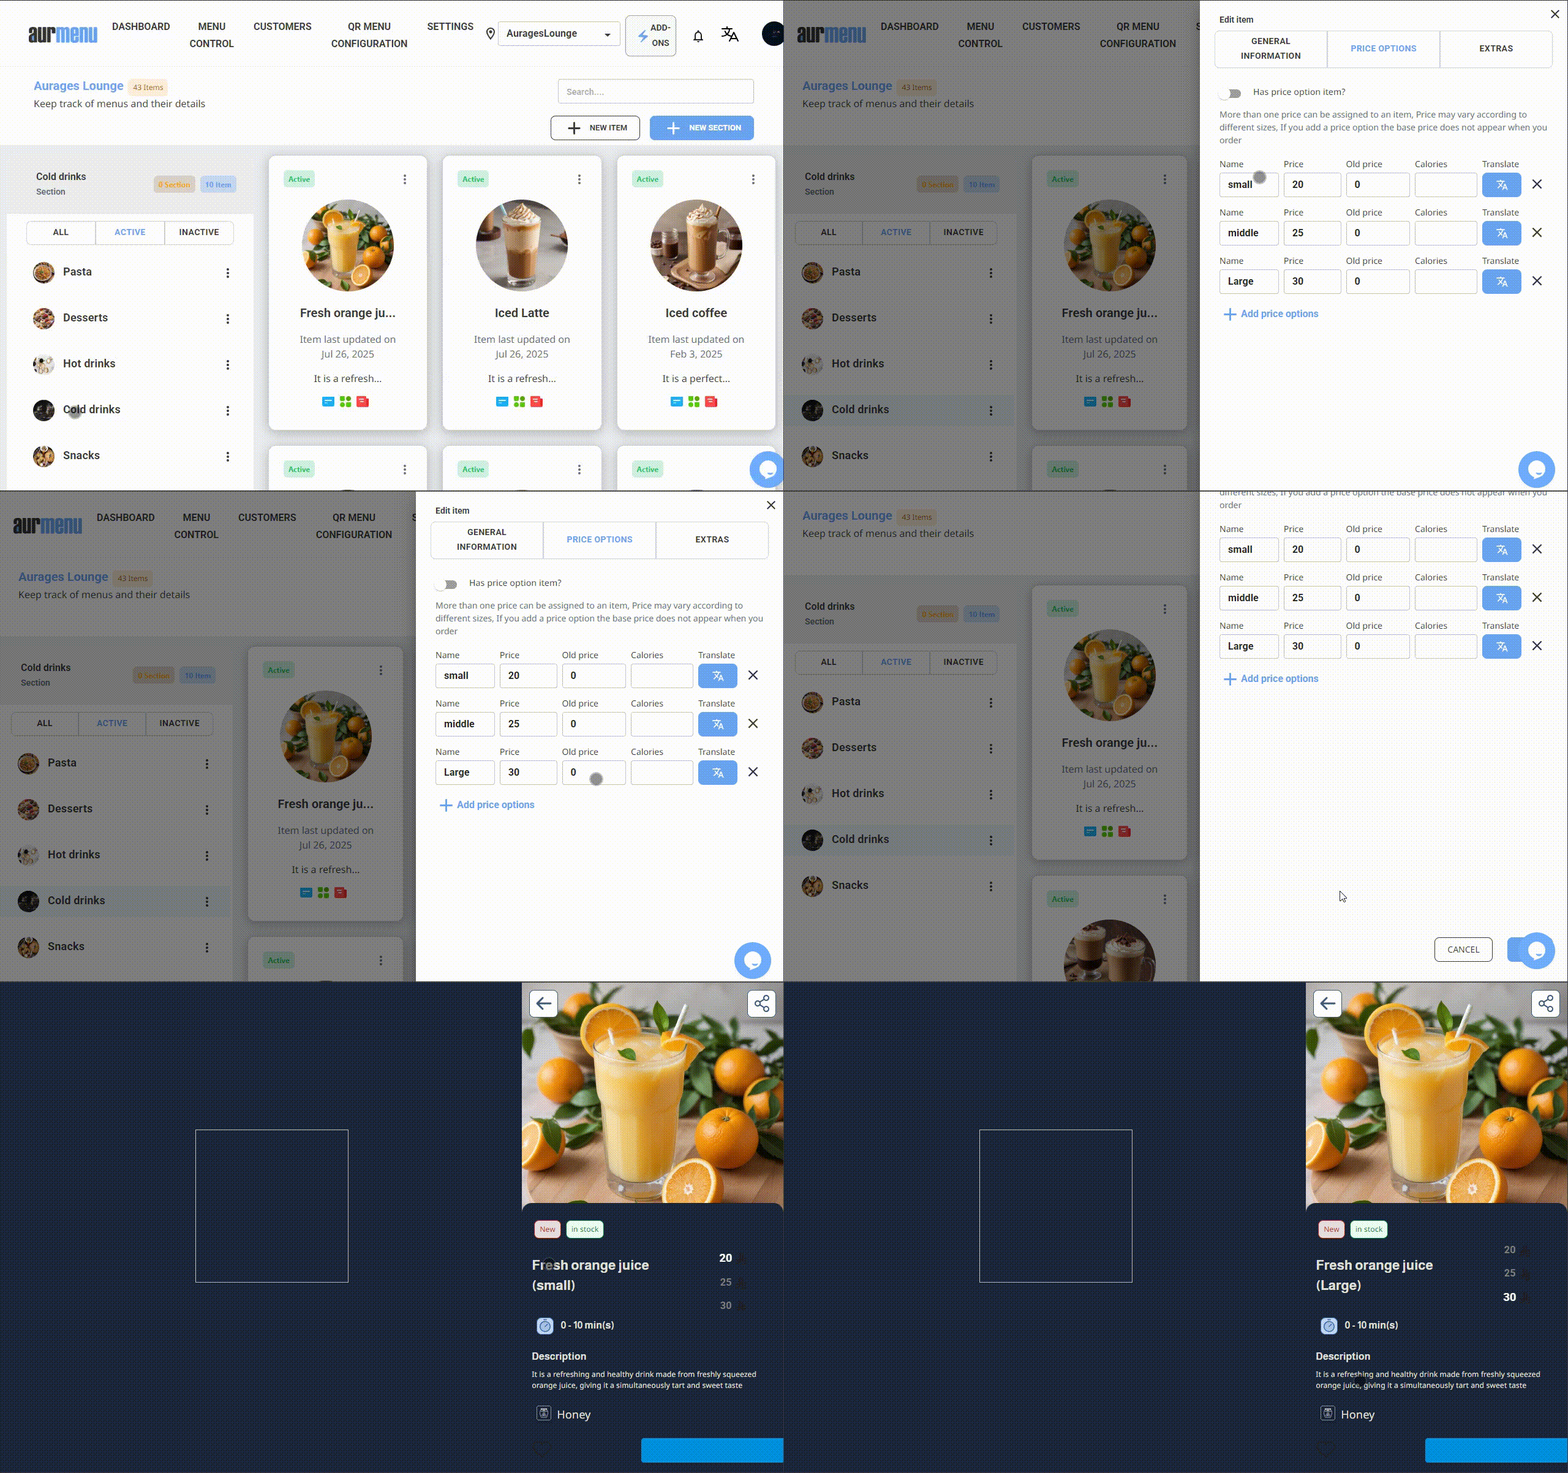
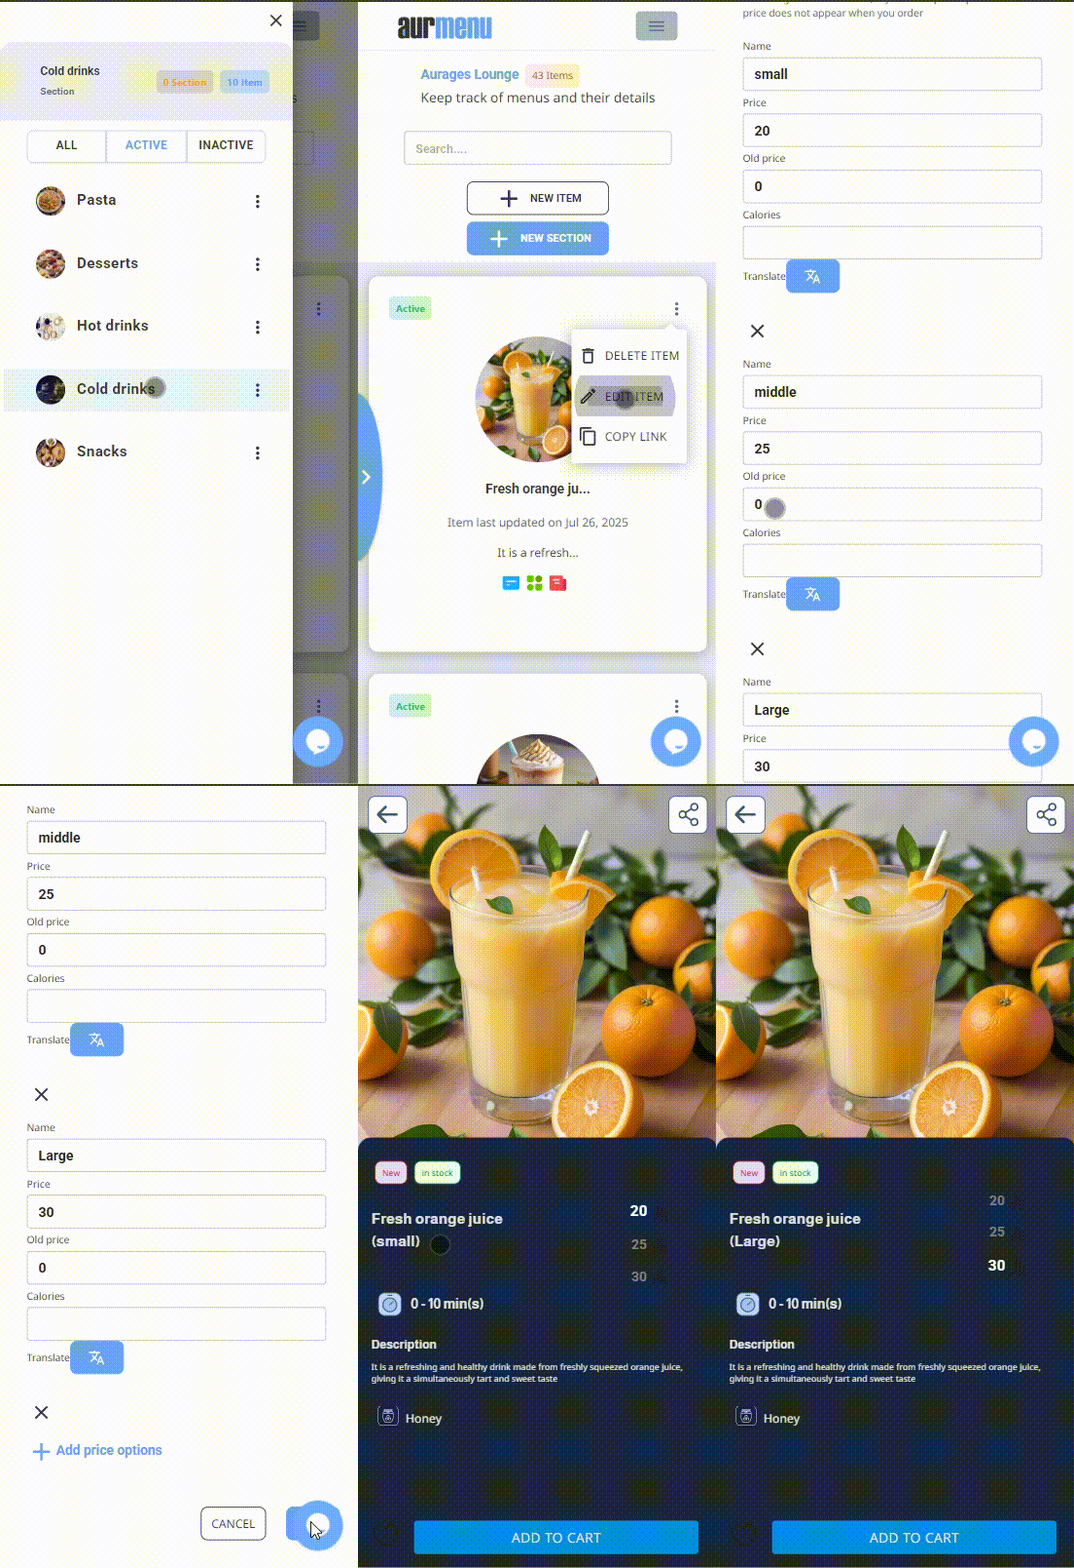
Orange Juice is offered as:
-
Small – 20 SAR
-
Medium – 25 SAR
-
Large – 30 SAR
➤ When to Use:
✳ When the difference is in quantity or price only.
✳ No need to track stock for each option separately.
➤ Steps to Configure in the System:
-
From the side menu, go to the designated section.
-
Create the item "Orange Juice".
-
In the item card, go to the Price Options tab.
-
Enter the options (Small – Medium – Large) along with prices and calories.
-
You can add other types like flavor or style.
-
Click Save.


3️⃣ Add-ons
➤ What are they?
Used to add optional components or notes to the order. Add-ons can be free or paid.
➤ Example:
Margherita Pizza with optional add-ons:
-
Extra Cheese – 10 SAR
-
Olives – 5 SAR
-
No Onion – Free
➤ When to Use:
✳ When the customer wants to customize the item.
✳ When you need to offer optional additions or removals.
➤ Steps to Link Add-ons (Free and Paid) to Items:
-
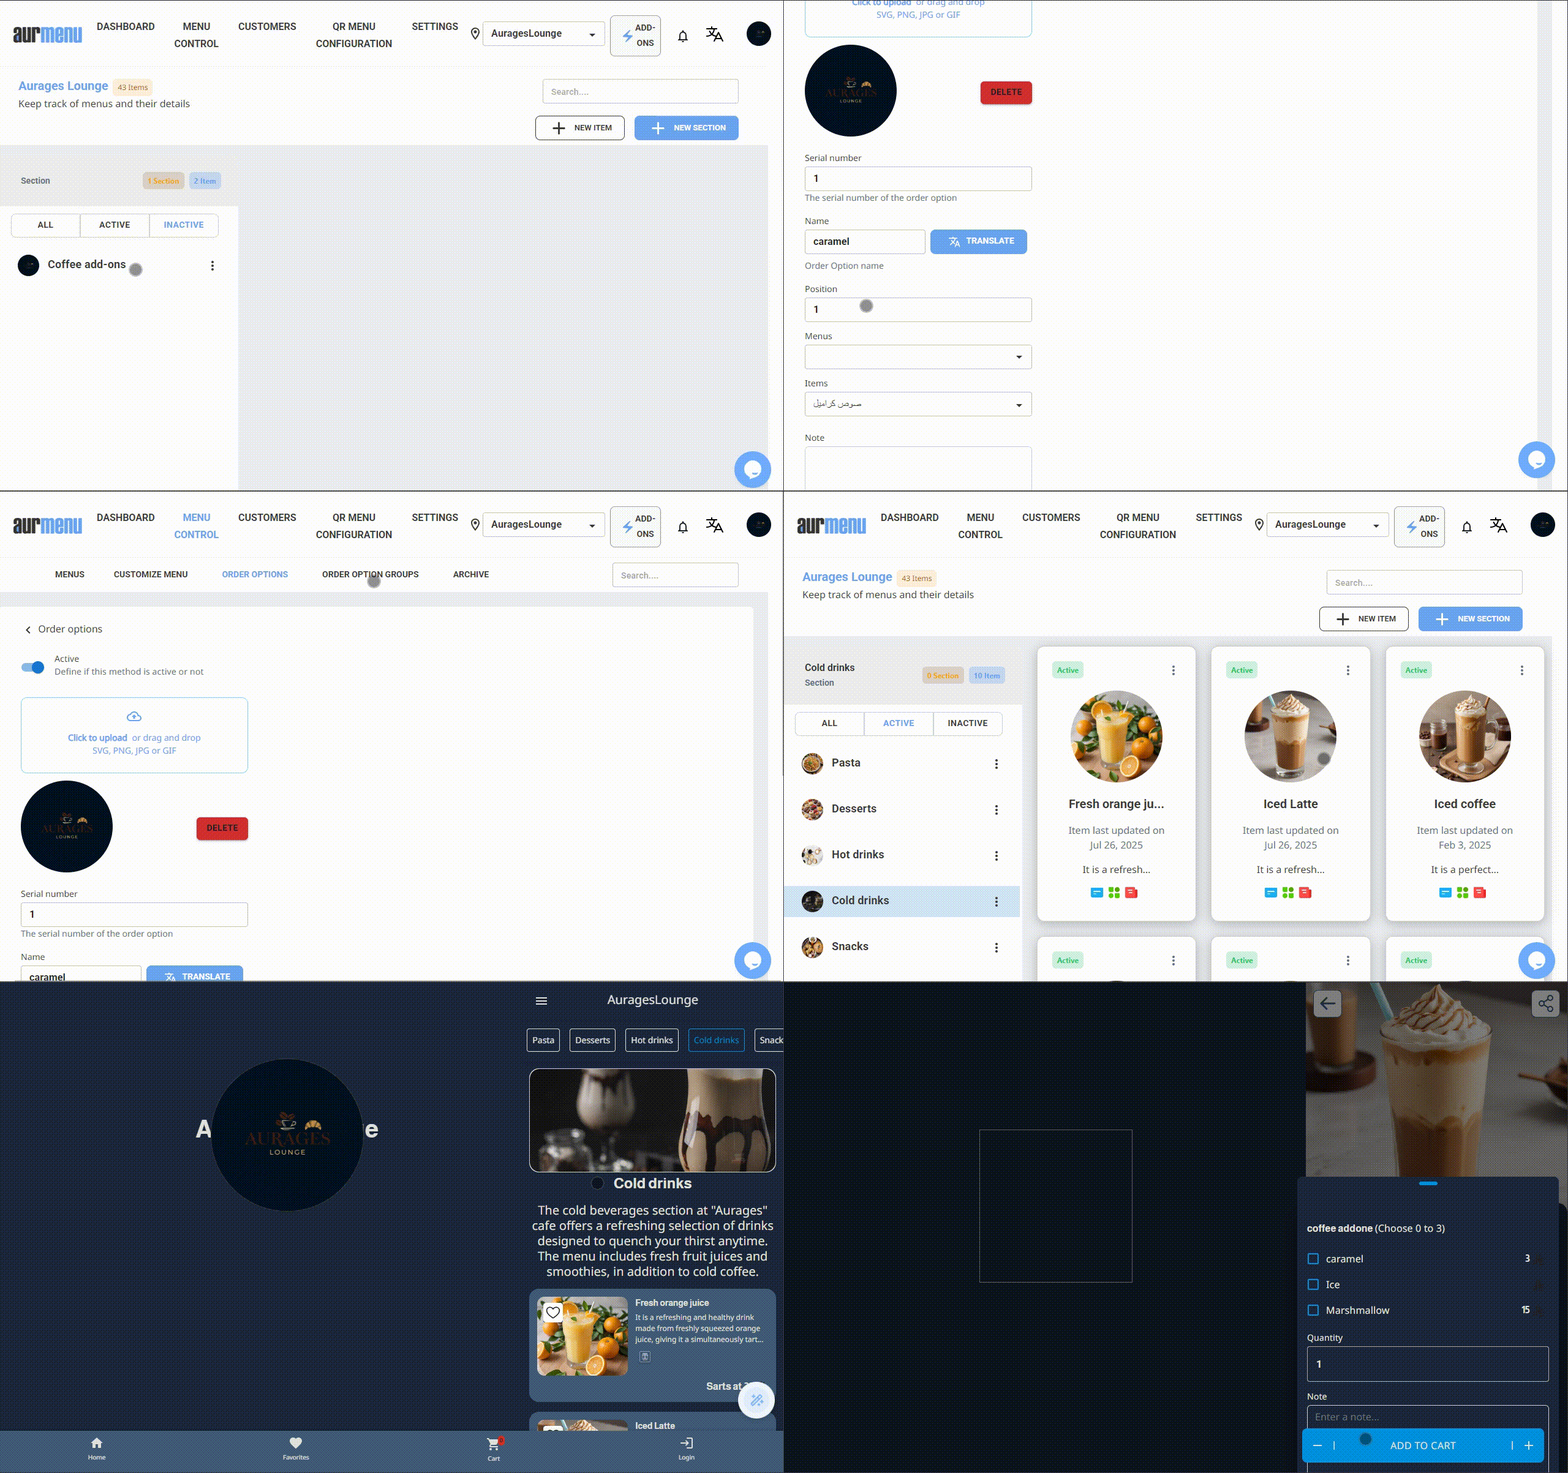
Create Add-ons:
From Menu Management ⟶ Order Options, click “Add New”, enter add-on names (e.g., Caramel, Marshmallow...), then click Save. -
Create a Section for Paid Add-ons:
From the menu containing the item (e.g., Iced Latte), create a new section for paid add-ons (e.g., Caramel – 10 SAR) and set the section to Inactive. -
Link Paid Add-ons to Items:
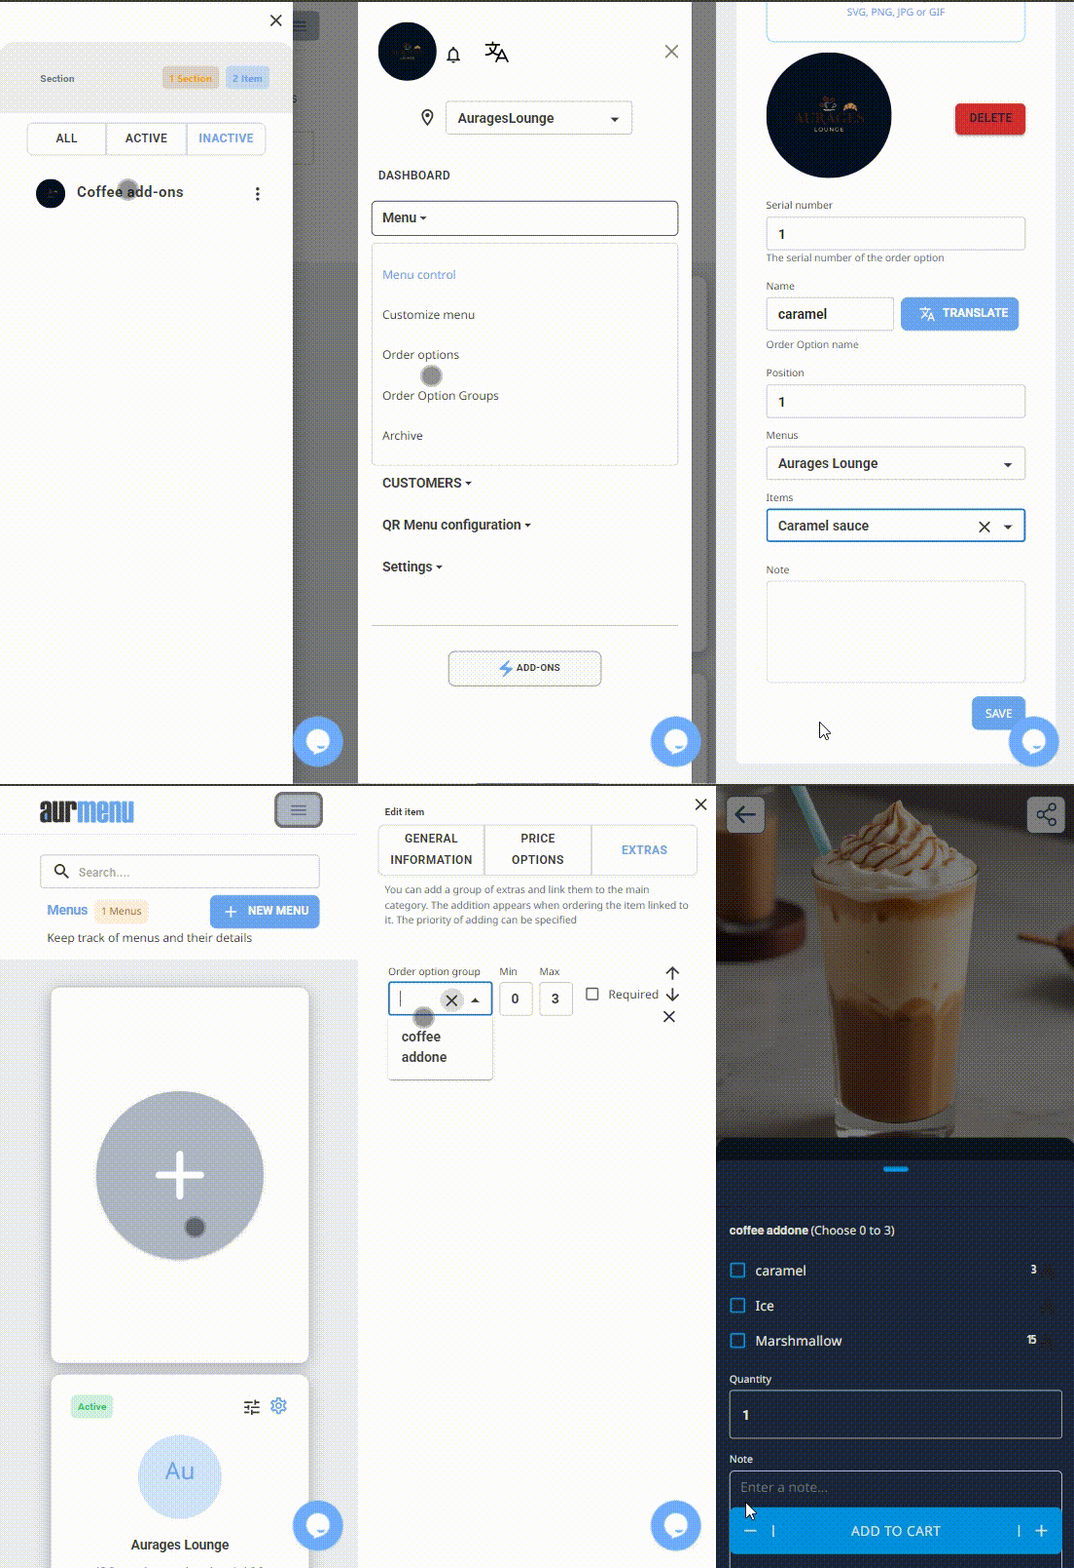
From Order Options, edit each paid add-on and link it to its corresponding item in the inactive section. -
Create an Add-on Group:
From Order Option Groups, create a new group (e.g., Coffee Add-ons), then add both free and paid add-ons to the group. -
Link Group to Item:
From the item settings in the menu, link the group "Coffee Add-ons", set minimum/maximum selections, then click Save.
✳ Note: After saving, add-ons will appear in the menu. Only paid add-ons will appear on the bill.
✍️ For a detailed guide with visuals and step-by-step instructions, refer to the following article:
[Article Link: Linking Add-ons to Items in the System]


✨ Important Notes:
-
You cannot use both Price Options and Item as a Price Option at the same time within the same item.
-
You can use Add-ons with either of the two methods above.
-
All options will automatically appear on the ordering screen based on the item settings.
 العربية