 العربية
⬜Venue Settings Guide in Aurmenu
Aurmenu allows you to easily customize your Venue settings . In this guide, we will walk you through the steps to configure your Venue settings.
✨ Steps to Configure Venue Settings in Aurmenu
1️⃣ Log into Your Account
If you haven’t registered yet, you can check the registration guide for detailed instructions.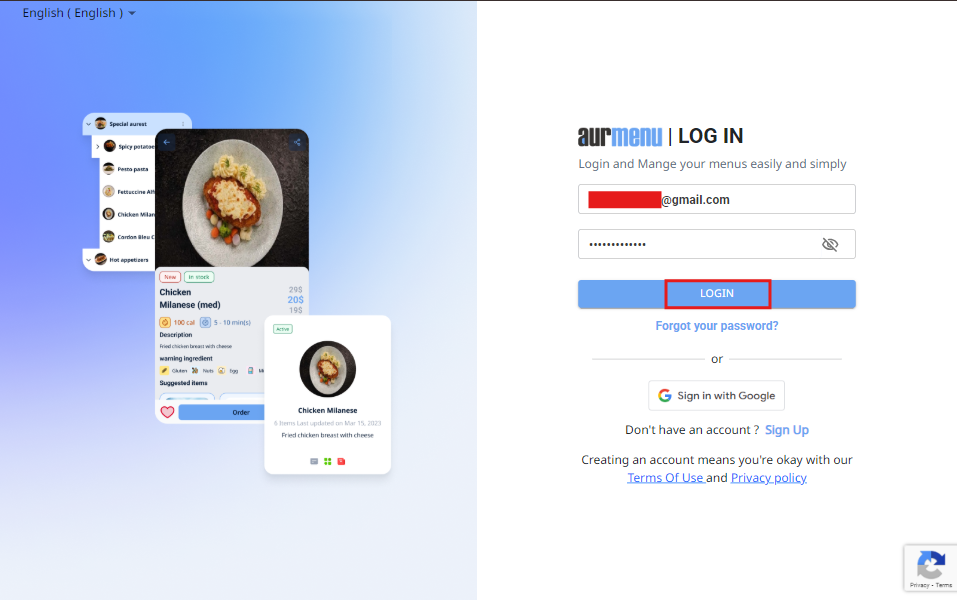
2️⃣ Navigate to Venue Settings
- After logging in, you will see the main dashboard.
- Click on "Settings" from the main menu.
- Several options will appear—select "Venue Settings."
3️⃣ Fill in the Venue Information
Once you enter the Venue Settings, you will see a set of fields that need to be filled out to properly configure your restaurant. Below is a list of required details:
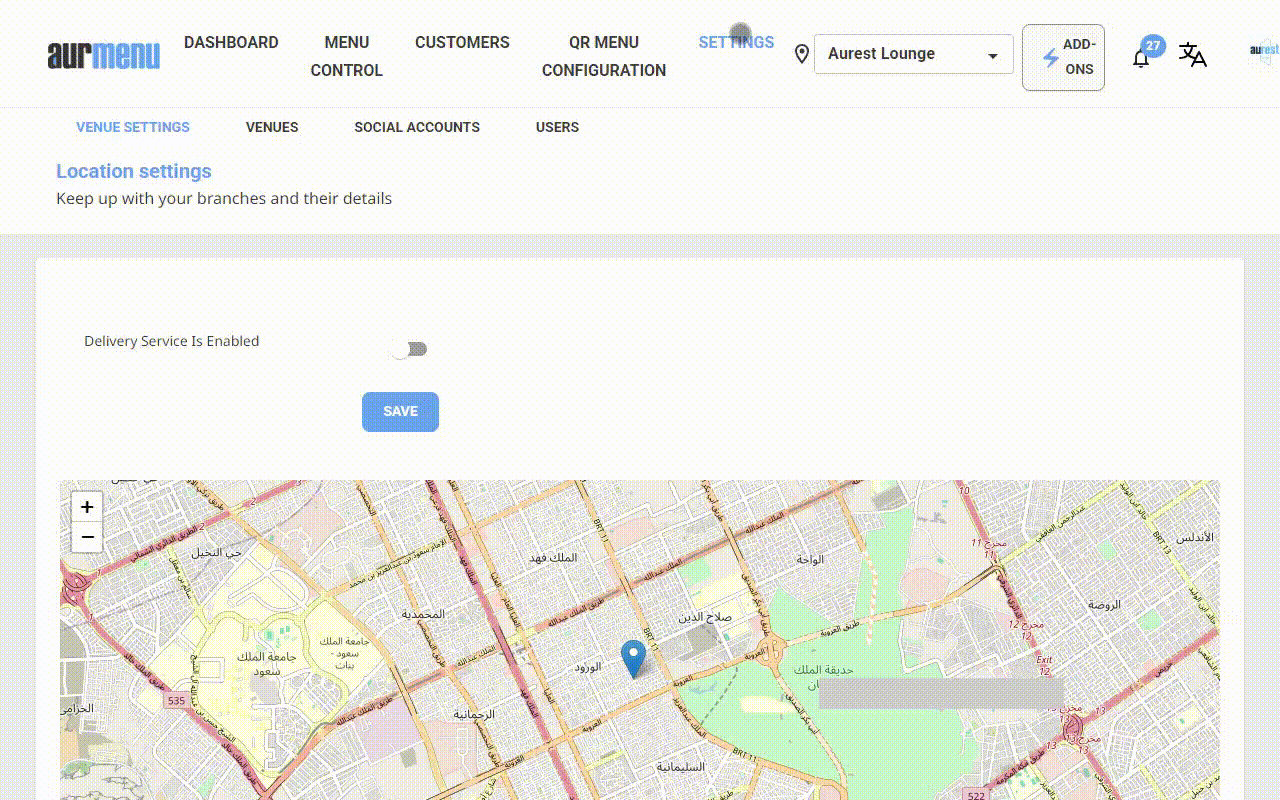
✅ Enable Delivery Service:
→ If you wish to enable delivery service for your branch, you can request this feature through Aurmenu Support.
→ Once the service is activated on your plan, your customers’ orders will be automatically linked to an authorized delivery service, ensuring smooth and professional order fulfillment.
→ After completing the activation process, the system will be integrated with Aurmenu.
→ Once enabled, you can manage the activation status from the branch settings, and don’t forget to click “Save” after making any changes.
✨ Essential Venue Information:
✅ Venue Name: Enter your restaurant or business name. You can also translate it automatically or manually into any added language using the translation button.
✅ Venue ID: Enter a unique identifier that distinguishes your restaurant in the system.
✅ Logo Image: Upload your logo.
✅ Cover Image: Add a professional cover image to represent your restaurant.
✅ Country: Select the country where your restaurant is located.
✅ State/Province: Enter the state or province your restaurant belongs to.
✅ City: Enter the city where your restaurant is located.
✅ Phone Number: Enter the primary contact number for customer communication.
✅ WhatsApp Number: Enter the WhatsApp number where orders from the main menu will be received.
✅ Time Zone: Select the local time zone to ensure accurate scheduling.
✅ Tax Rate: Specify the applicable tax percentage for your country.
✅ Selective Tax: Enter the selective tax rate if applicable.
✅ Currency: Choose the currency your restaurant operates with.
✅ Supported Languages: Select the languages your account will support (up to 26 languages available).
✅ Branch Location on Map: You can set your exact branch location by entering latitude and longitude or selecting it directly on the map.
✅ Maximum Delivery Distance (km): Define the maximum distance allowed for deliveries from your branch.
✅ Privacy Policy: Add customized privacy policy text to be displayed to your customers.
✅ Terms & Conditions: Add your restaurant’s terms and conditions.

✨ Important Notes
✔ You can edit this information anytime through Branch Settings.
✔ Make sure to enter accurate details to ensure a smooth customer experience.
✔ Adding multiple languages helps enhance the experience for international customers.
✔ Enabling the delivery service with Aurmenu partners allows you to connect orders to approved delivery services automatically and seamlessly.